
Scripting with SwiftUI (II) - Scripts Provider
Tutorial13 December 2020
This tutorial is the second one of the series "Scripting with SwiftUI". This series goal is to use SwiftUI in Swift scripts that can be easily shared. As this use case is more common for Mac admins, those tutorials are addressed to this audience. Noneless a Swift developer could find interesting techniques in those tutorials.
If you have not already done it, I advice you to follow the first tutorial Coding a color picker view which explains some basis about SwiftUI required for this tutorial.
Exposition
In this tutorial, we will implement a scripts provider interface. From what I have seen, I believe it could be useful to let an end-user or a technician be able to simply choose a script and execute it through a GUI. A starter project can be found here, with the skeleton needed to start an interface in a script. Also, the final project is available, as well as the final challenge version. In this project, two stub scripts are provided to test: task.sh and long-task.sh. Details will be provided when needed.
Here is what the interface will look like.
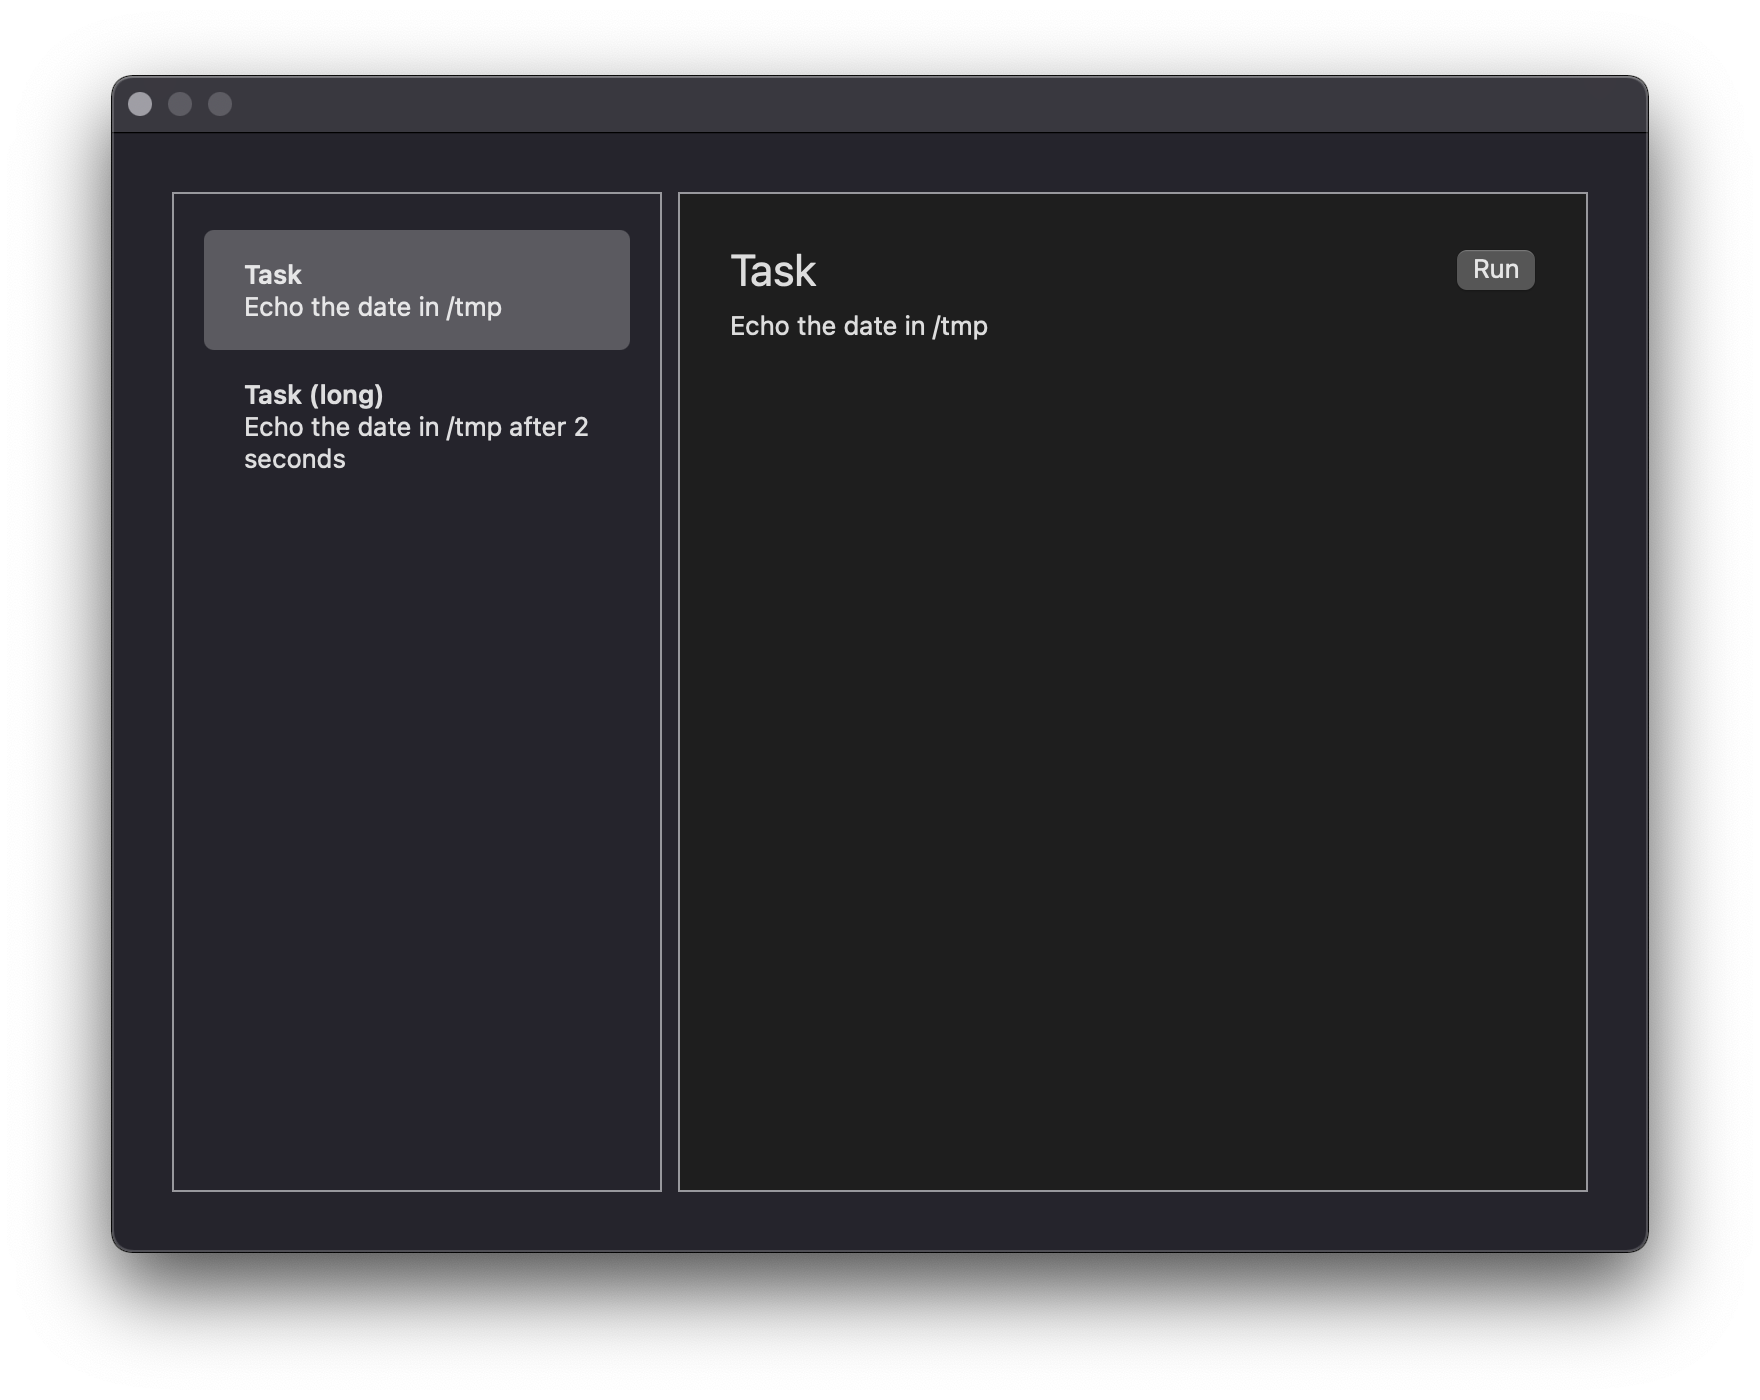
On the left will be displayed a list of available scripts that the user can choose. On the right, details of the selected will be provided, as well as the "Run" button to execute it. A spinner will be displayed when the script is running.
Quick project overview
You can find the materials for the tutorial here. Open the starter project, you should see some code already present and which is similar to the one written in the previous tutorial. Here is a quick overview:
- Constants: the properties that will be used in the overall script. The 6 first ones deal with the app, its window and the view proportions. The second ones bridge two colors of AppKit to SwiftUI. You can learn more about the macOS system colors here.
- Models: that's where the data models to be used in the script will be implemented.
- Views: as for the previous tutorial, this section will contain the views. For now, it only contains the
MainViewthat will be used to gather all the views in one. - Setup: this last part is the same as the previous tutorial and holds the logic to start the interface in the script.
All right, enough talks. Time to start coding!
Modelling the data
First, we should find a way to store a script informations. If you take a look at the final interface screenshots, you can guess that we will need to store several things:
- The script name that will be displayed in the list and in the script details view
- The script details that will be displayed in the list and in the script details view
- The script path that will be used to find the script to execute
struct Script {
    let name: String
    let details: String
    let path: String
}
class and struct
If you are wondering what's the difference between a class and a struct: a class is a reference type, which means that when a new class is instantiated with its value, it's the reference (i.e. the memory address) that is copied. For a struct, its the value at the memory that is copied and not the address itself : it's a value type. Although this is over-simplified since Swift uses Copy on Write technique, it should suffice for this tutorial.
Fo this tutorial, we will only have to work with two scripts and I think it's a good idea to take advantage of Swift powerful extension feature. We will define our two scripts in an extension of the Script structure as static constants. You can add the following below the Script structure closing curl bracket.
extension Script {
    static let task = Script(name: "Task",
                             details: "Echo the date in /tmp",
                             path: "/Users/alexisbridoux/Desktop/task.sh")

    static let longTask = Script(name: "Task (long)",
                                 details: "Echo the date in /tmp after 2 seconds",
                                 path: "/Users/alexisbridoux/Desktop/long-task.sh")
}
Be careful to change the path to the script for the one you chose.
This way, we can access the scripts in a logic way which also does not impact any global constant.
let task = Script.task
let longTask: Script = .longTask
Now that we can specify a script, how should we make them available? In the previous tutorial, we stored the colors to be displayed in a global array which is fine in a script. Here we will use another solution: the scripts list and the selected script index will be stored in a class ScriptsProvider that the views will share. As we will see, using a class here rather than a struct will be useful to have every view knows about the same current selected script index.
Here it is with a breakdown.
// 1
final class ScriptsProvider {
    // 2
    let scripts: [Script] = [.task, .longTask]

    var selectedScriptIndex = 0

    // 3
    var selectedScript: Script {
        scripts[selectedScriptIndex]
    }
}- The class is marked as
finalwhich prevents any subclassing. This is not required but most often when I create a class I prefer to prevent subclassing and change it later if needed. - Since there is no need to modify the scripts list yet, the property is a constant.
- The computed property
selectedIndexwill only be used to more easily access informations about the current selected script. As it is computed, it will not allow any modifications.
Hard-coding the scripts list is simple but not very flexible. In the next tutorial we will see how to import and export data to/from JSON or Plist files.
That's it for the models! We will come back to it later when needed but for now it's enough. Your models should look like this.
// MARK: - Models

struct Script {
    let name: String
    let details: String
    let path: String
}

extension Script {
    static let task = Script(name: "Task",
                             details: "Echo the date in /tmp",
                             path: "/Users/alexisbridoux/Desktop/task.sh")

    static let longTask = Script(name: "Task (long)",
                                 details: "Echo the date in /tmp after 2 seconds",
                                 path: "/Users/alexisbridoux/Desktop/long-task.sh")
}

final class ScriptsProvider {
    let scripts: [Script] = [.task, .longTask]
    var selectedScriptIndex = 0

    var selectedScript: Script {
        scripts[selectedScriptIndex]
    }
}

// MARK: - Views
Now that the models are ready, it's time for some SwiftUI magic! 🧙♂️
Views
As mentioned earlier, the main view is composed of a scripts list view - that will be named ScriptList - and a script detail view - ScriptDetails.
Scripts List
If you had used UIKit or AppKit before, you should be familiar with the concept of TableView. It's a simple to use view to display rows of information. And I have good news, it's even easier to use the SwiftUI counterpart: List.
To see the List in action, we will start simple. Then we'll flesh it out.
// 1
struct ScriptList: View {

    // 2
    var scriptsProvider: ScriptsProvider

    var body: some View {
        // 3
        List(0..<scriptsProvider.scripts.count) { index in
            // 4
            Text(scriptsProvider.scripts[index].name)
        }
    }
}- Here the view is declared.
- The structure will need a
ScriptsProviderto know what scripts should be displayed, and specify that a script has been chosen. This property will be passed in the initialisation so that theScriptsProvideris the same for everyone (remember: classes are reference types). - Here, we declare a
Listthat will display as much elements as they are scripts in thescriptsProvider.scriptsarray thanks to the open range operator..< - Each element that is displayed will be a
Textview. We will improve that, don't worry!
To use this new view, it's needed to insert it in MainView. As long as we are here, we will embed the ScriptsList view in a HStack now for it will be simpler when inserting the right view - ScriptDetails. So please update MainView like so.
struct MainView: View {
    // 1
    let scriptsProvider = ScriptsProvider()

    var body: some View {
        HStack {
            // 2
            ScriptList(scriptsProvider: scriptsProvider)
                // 3
                .padding(.top, 5)
                .frame(width: scriptListWidth, height: windowHeight)
                .border(Color.gray)
        }
    }
}- The
ScriptsProviderobject that we will share can be declared in the higher ancestor view - hereMainView. - The property
scriptsProvideris then passed to theScriptsListwhen initialising it. - Here we add some visual content to like the padding or a border. Also, we ensure the
ScriptListhas a fixed width.
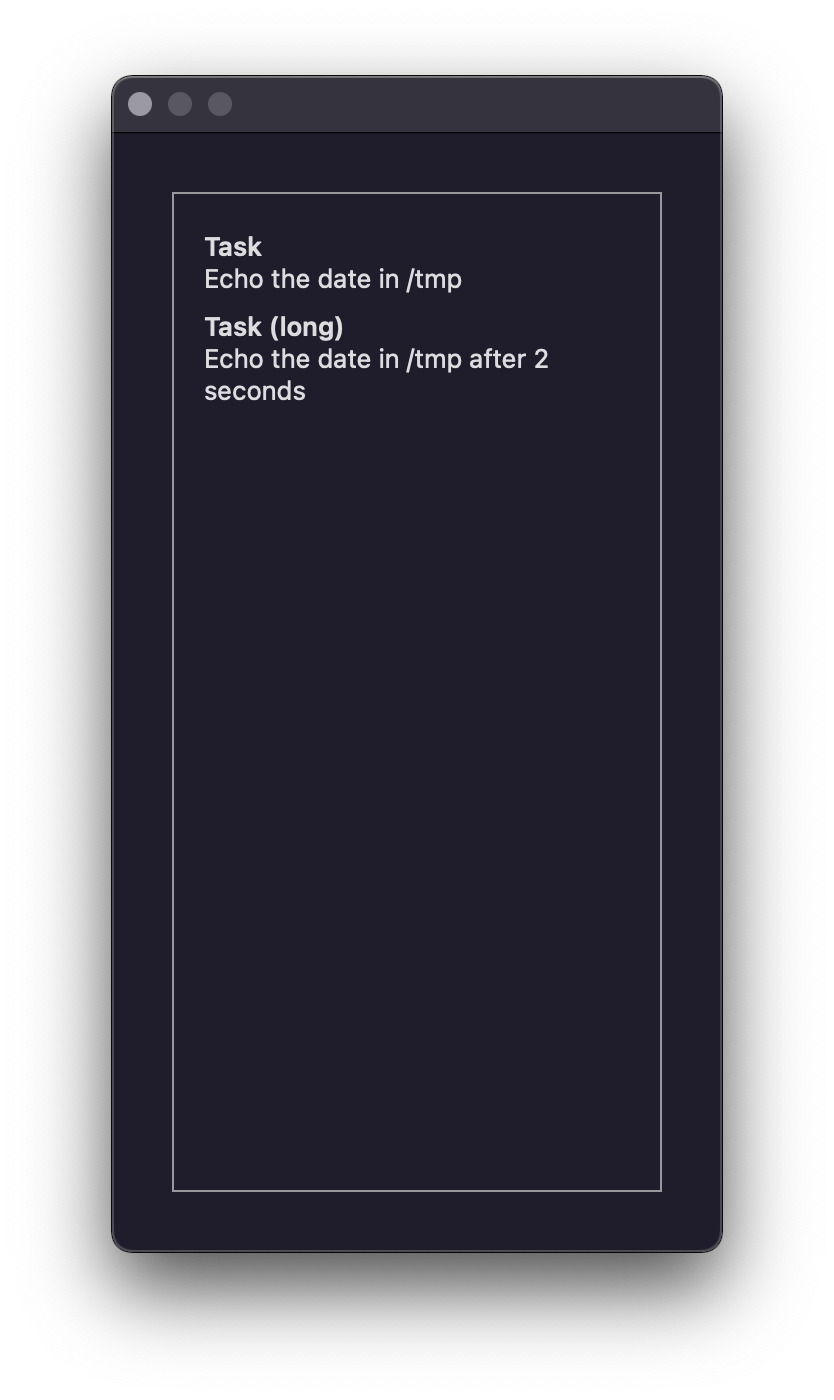
You can run the script now, and see the names of the two scripts we declared. Not really interesting yet but it's working! Let's make it nicer.
To display the script name and the script details vertically, you can guess that we will need a VStack. So if you replace the Text view in the list by the following, you should get a better result.
VStack(alignment: .leading) {
    Text(scriptsProvider.scripts[index].name)
        .fontWeight(.semibold)
    Text(scriptsProvider.scripts[index].details)
        .lineLimit(2)
}fontWeight or
lineLimit are called
modifiers as they will transform a
View into a new one with a modification. As you can guess,
fontWeight applies a specific weight to the text font and
lineLimit will prevent the
Text view from expanding even if it does not completely appear. Thus shrinking the text.
Modifiers really transform a view into a new one, meaning that it's not the same object. It's a new View that you'll get after applying a modifier. No problems though since Views are structures and thus are value types.
If you run the app now, you should see some progress.
Select a script
In order to clearly see the selection, we will first add a coloured background to the selected row. To do so, we will cheat a bit, because where would be the fun if playing by the rules? To have a coloured background on a single row, we will add a background to all rows, but make only the one for the selected row no transparent. This is done by changing the Color.opacity property from 1 to 0. This logic will be placed inside an opacity(for:) function. This is what it looks like.
struct ScriptList: View {
    var scriptsProvider: ScriptsProvider

    var body: some View {
        List(0..<scriptsProvider.scripts.count) { index in
            VStack(alignment: .leading) {
                Text(scriptsProvider.scripts[index].name)
                    .fontWeight(.semibold)
                Text(scriptsProvider.scripts[index].details)
                    .lineLimit(2)
            }
            // 1
            .padding(.vertical, 5)
            .padding(.horizontal, 20)
            // 2
            .frame(maxWidth: scriptsListWidth,
                   minHeight: 60, maxHeight: 60,
                   alignment: .leading)
            // 3
            .background(Color.selectedText.opacity(opacity(for: index)))
            // 4
            .cornerRadius(5)
        }
    }

    // 5
    func opacity(for index: Int) -> Double {
        scriptsProvider.selectedScriptIndex == index ? 1 : 0
    }
}- We add some padding for the background color to not stick to the text.
- As the
Textviews have a line limit, they will try expand horizontally, which will not be nice because they will not have the same width. Here we ensure the width is the same for everyTextby setting its maximum width to the one of its parent. - The background color is set, with its opacity set to the result function
opacity(for:) - The corner radius is set after the background color. That's because modifiers are applied in their specification order, and it sometimes has an impact on the view. Explaining the all concept of the views in SwiftUI is beyond the scope of this tutorial, but if you want to see that in action, try to put the
cornerRadiusmodifier before thebackgroundone. - This function simply returns 1 if the test
scriptsProvider.selectedScriptIndex == indexistrueand 0 otherwise. Here, we use the ternary operator.
// 1
.contentShape(Rectangle())
// 2
.onTapGesture {
    scriptsProvider.selectedScriptIndex = index
}- In a stack, only the content that is drawn on the screen can be interacted with. But the framework allows us to declare that all a specific frame of the stack should be made tappable - here its rectangle.
- To watch for a tap (i.e a click on macOS), we simply have to add a
tapGesturemodifier with a function to be ran each time the event happens. Trust me that's really nicer than the AppKit version!
What ?!
Nothing is happening?
Now wait a minute. Remember what we had to do in the previous tutorial to observe a variable modification and propagate it in the views? We declared State property! Unfortunately, the State property wrapper will not work with a class or a structure and is not suitable for the scriptsProvider property. Its purpose is to observe a simple type or value. And here it's a property inside the scriptsProvider which is changed. Fortunately enough, SwiftUI provides a way to resolve this matter: the ObservableObject protocol.
This protocol can only work with reference types, and you might start to think that I have an obsession on this topic! In fact, it's an huge topic and it's normal to have to deal with it on a daily basis. Here, ObservableObject will allow us to observe the properties of an object. If this object was a value, like a struct, each time a property would be modified, the whole object would change. Thus it would not really make sense to observe that. Do not worry though if it does not seem really clear yet, it's not required to fully understand it to use it. And you'll get used to it in Swift.
To use ObservableObject we have two steps to perform. First, the ScriptsProvider class has to declare that it conforms to the protocol. And then it should specify which properties should be observed with the Published property wrapper, which is somehow equivalent to State but it will make the ScriptsProvider object notifies SwiftUI that a property has changed and that the view should be redrawn. Here it is.
final class ScriptsProvider: ObservableObject {
    let scripts: [Script] = [.task, .longTask]
    @Published var selectedScriptIndex = 0

    var selectedScript: Script {
        scripts[selectedScriptIndex]
    }
}
Our second task is to make the views aware that the property scriptsProvider can now be observed. To do so, the view that instantiates it should add a StateObject property wrapper. So in MainView change the line
scriptsProvider = ScriptsProvider()@StateObject var scriptsProvider = ScriptsProvider()MainView declares an
StateObject, how should it let its children view know that there is an object to be shared? Once again,
SwiftUI brings the answer with the
environmentObject modifier. By using it, we can pass an
ObservableObject to a child view. When this child view modifies this object, the changes will be propagated back to its parent view.
This is how it can be done: first, replace the ScriptList view in MainView from
ScriptList(scriptsProvider: scriptsProvider)ScriptList()
.environmentObject(scriptsProvider)scriptProvider property in
ScriptsList. It's simple though: replace the declaration of
scriptsProvider to
@EnvironmentObject var scriptsProvider: ScriptsProviderScriptsList.scriptsProvider property to the environment object
scriptsProvider.
Finally (for real this time), you can run the script and see the background color changing when you click on the other row. Hurrah!
If you wonder, SwiftUI matches the environment objects with types. Here, the type of ScriptsList.scriptProvider and the environment object passed with .environmentObject(scriptProvider) matches. This technique has some limits. For example, it's not possible yet to pass two objects with the same type, because two object will match. Also, an oversight of an .environmentObject and the program will exit with a fatalError with no warnings at build time (you can try that by commenting out the line with .environmentObject(scriptsProvider) .
That's if for the left view! You can take a break now. The right view should be easier with your knowledge of the environment objects.
Scripts Details
Now that theScriptsList view is implemented, let's think about a way to implement the
ScriptDetails one. And there are several possibilities. I do not know a way to find the best views composition yet so we will a solution that I find simple. And we will use stacks.
Stacks in SwiftUI are really a simple yet powerful way to layout views. This is why they are used so often. Even with UIKit Apple was already recommending the usage of the UIStackView because they take care of some layout work for us - almost for free most often.
To get the expected result, two stacks will be needed here. (The spinner will be added in final part so feel free to ignore it for now).
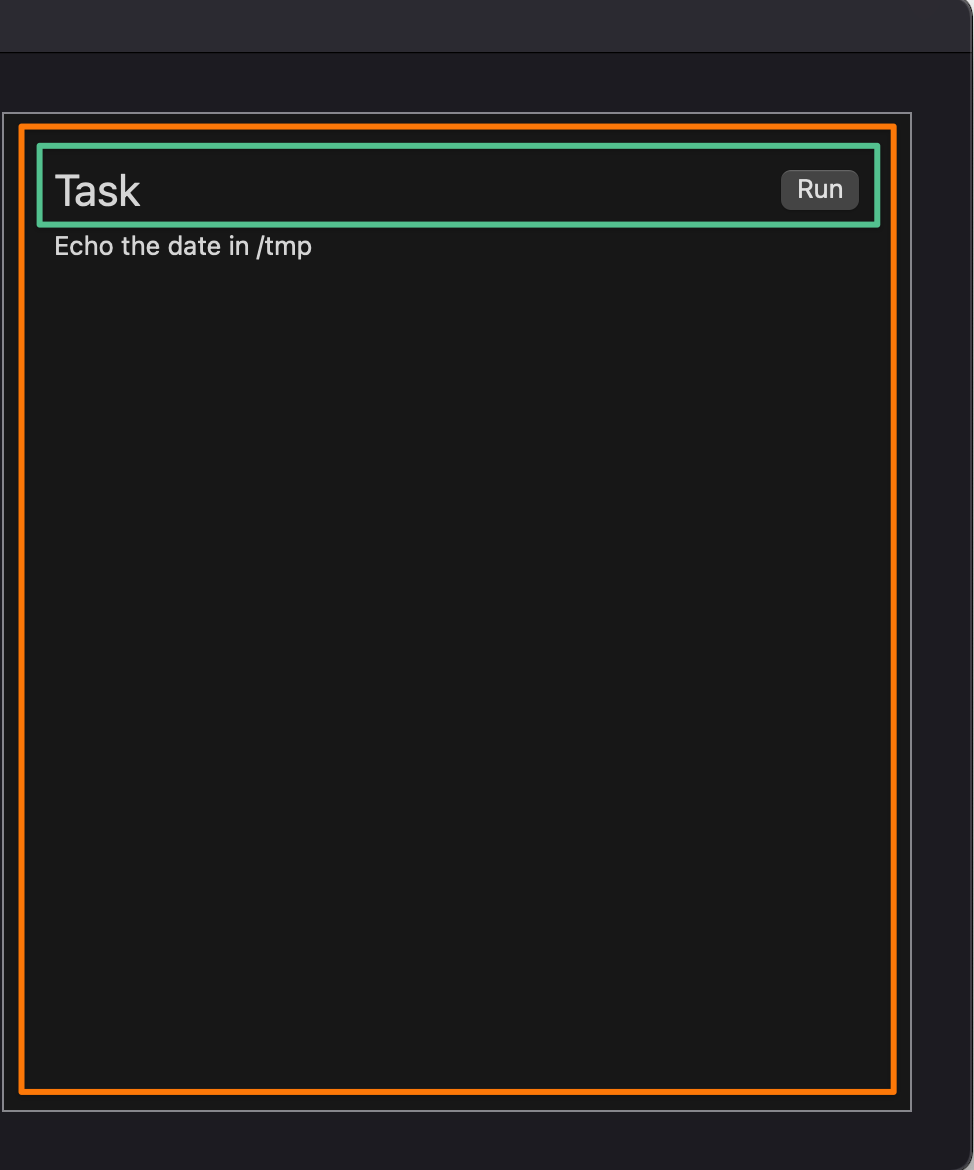
HStack to push the "Run" button to the right edge of the window. The orange one will be a
VStack to layout the row "Task + Run" and below it the script details.
If you want, you can try to code this part yourself. I'll be waiting with the solution below. Here are some hints:
- Don't forget to add a
scriptsProviderproperty as an environment object. - It's possible to specify how the text should be aligned in a
VStackwith thealignmentparameter. - You can use a
Buttonwith a label and an empty action function. We shall fill this action soon. - When the
ScriptDetailsview is ready, you can add it to theMainViewbelow the last modifier ofScriptsList.
🕒
🕓
🕔
Finished? Let's compare. Here is my solution with a breakdown.
struct ScriptDetail: View {
// 1
@EnvironmentObject var scriptsProvider: ScriptsProvider
var body: some View {
// 2
VStack(alignment: .leading) {
// 3
HStack {
Text(scriptsProvider.selectedScript.name)
.font(.title)
Spacer()
Button("Run") {
// 4
print("Run script at \(scriptsProvider.selectedScript.path)")
}
}
// 5
Text(scriptsProvider.selectedScript.details)
Spacer()
}
.padding()
}
}- A
scriptsProviderproperty will be passed as en environment object, similarly with theScriptsListview. - The
VStackis the higher view in the hierarchy, and will align the text on the leading side (left when the language is read from left to right). - The
HStackholds the script title and the "Run" button. TheSpacerwill push the button to the right. - When the "Run" button is clicked or tapped, the code inside that closure will be executed. We will take part of this in the next part. For now, it simply prints a message in the console. To see it, tap ⇧⌘Y.
- The script details text is specified below the
HStack, and aSpacerwill push those views to the top.
Then to add this view to the MainView
struct MainView: View {
@StateObject var scriptsProvider = ScriptsProvider()
var body: some View {
HStack {
ScriptList()
    .environmentObject(scriptsProvider)
.frame(width: scriptListWidth, height: windowHeight)
.border(Color.gray)
ScriptDetail()
.environmentObject(scriptsProvider)
.frame(width: scriptsDetailWidth, height: windowHeight)
.background(Color.controlBackground) // 1
.border(Color.gray)
}
}
}- The background color has to be specified here but not for the
ScriptsListview becauseListviews already have a specific translucent background.
Execute the selected script
The logic that will run the selected script should be put somewhere, and I find the ScriptsProvider class to be a perfect fit. Thus we will add a runSelectedScript function to this class. But before, I would like you to add another property to the Script structure. This property will be a boolean named isRunning and will hold the information whether the script is running or not. This will let us know for example if the spinner should be visible or not.
So please add this property to the Script structure.
struct Script {
    let name: String
    let details: String
    let path: String
    var isRunning = false
}runSelectedScript function in the
ScriptsProvider class. Here it is.
func runSelectedScript() {
    // 1
    let selectedIndex = selectedScriptIndex
    let selectedScript = self.selectedScript
    let url = URL(fileURLWithPath: selectedScript.path)

    // 2
    let task: NSUserScriptTask
    do {
        task = try NSUserScriptTask(url: url)
    } catch {
        print("✖︎ Error while loading the script at \(selectedScript.path). \(error), \(error.localizedDescription)\n")
        return
    }

    // 3
    scripts[selectedIndex].isRunning = true

    // 4
    task.execute { [unowned self] error in if let error = error {
            print("✖︎ The script at \(selectedScript.path) finished with an error: \(error), \(error.localizedDescription)\n")
        } else {
            print("✓ The script at \(selectedScript.path) finished successfully\n")
        }
        // 5
        DispatchQueue.main.async {
            self.scripts[selectedIndex].isRunning = false
        }
    }
}- Some local constants are set for an easier usage. The selected script index in the
scriptsarray, the selected script informations and the URL from the selected script path. - Apple provides an API to execute a script on macOS:
NSUserScriptTask. It's quite simple to use although it does not allow to retrieve the script output, and will throw an error if the script has no shebang. This is the reason of the do-try-catch usage here: to print an error if the script cannot be executed. - Before running the script, we have to think about setting the selected
ScriptisRunningproperty to let the rest of the program know that this script is being executed. This is done by targeting the script at the index and not theself.selectedScriptproperty since this one is computed only and we cannot change it. - When executing a script, Apple provides a way to let us handle the script completion with a callback function - a very common pattern in Apple's APIs. This function will take an optional error as parameter to let us know if an error occurred. If the error is not nil, an error occurred and we can print its description in the console to debug. Otherwise, we print a successful message.
- As the script completed - successfully or not - we can set the property
isRunningback to false. But wait, what isDispatchQueue.main.async?
Thanks for asking! The script execution is performed on another thread, meaning that the system will not execute it synchronously with the rest of our code. As soon as the execution enters thetask.executefunction, it will jump to the end of the closure, and the script execution will be performed elsewhere then will call the callback function to let us know the script has been executed - with or without an error. The reason of doing so is that the script could be long to run, and if the program had to wait for the script to complete, it would not be able to update the interface as only one instruction can be executed at at time. Thus, the user would think the UI is frozen, which is not good.
Finally, when the callback function is called, it is executed from the thread where the script was run. However, the UI should always be updated on the main thread and changing the propertyisRunningwill have an impact on the interface, since we want to update a spinner. This is Apple requirement for the interface and it's a golden rule. Here we ensure that the change is performed on the main thread using theDispatchQueueAPI.
There is a lot of interesting stuff to deal with threads and UI but I think that's enough about this topic in this tutorial. Just remember that the script is executed on another thread and that the UI should be always updated on the main thread.
The compiler should complain that we modify the scripts property of the ScriptsProvider although it's a constant so we have to change it from a constant to a variable. Please do that by changing let scripts: to var scripts:
Now we can use this function inside the Button view in ScriptsDetails. You can replace the line
print("Run script at \(scriptsProvider.selectedScript.path)")scriptsProvider.runSelectedScript()You can use the provided task.sh and long-task.sh to test the behavior. Those script echo the date in /tmp/script-provider-test.log
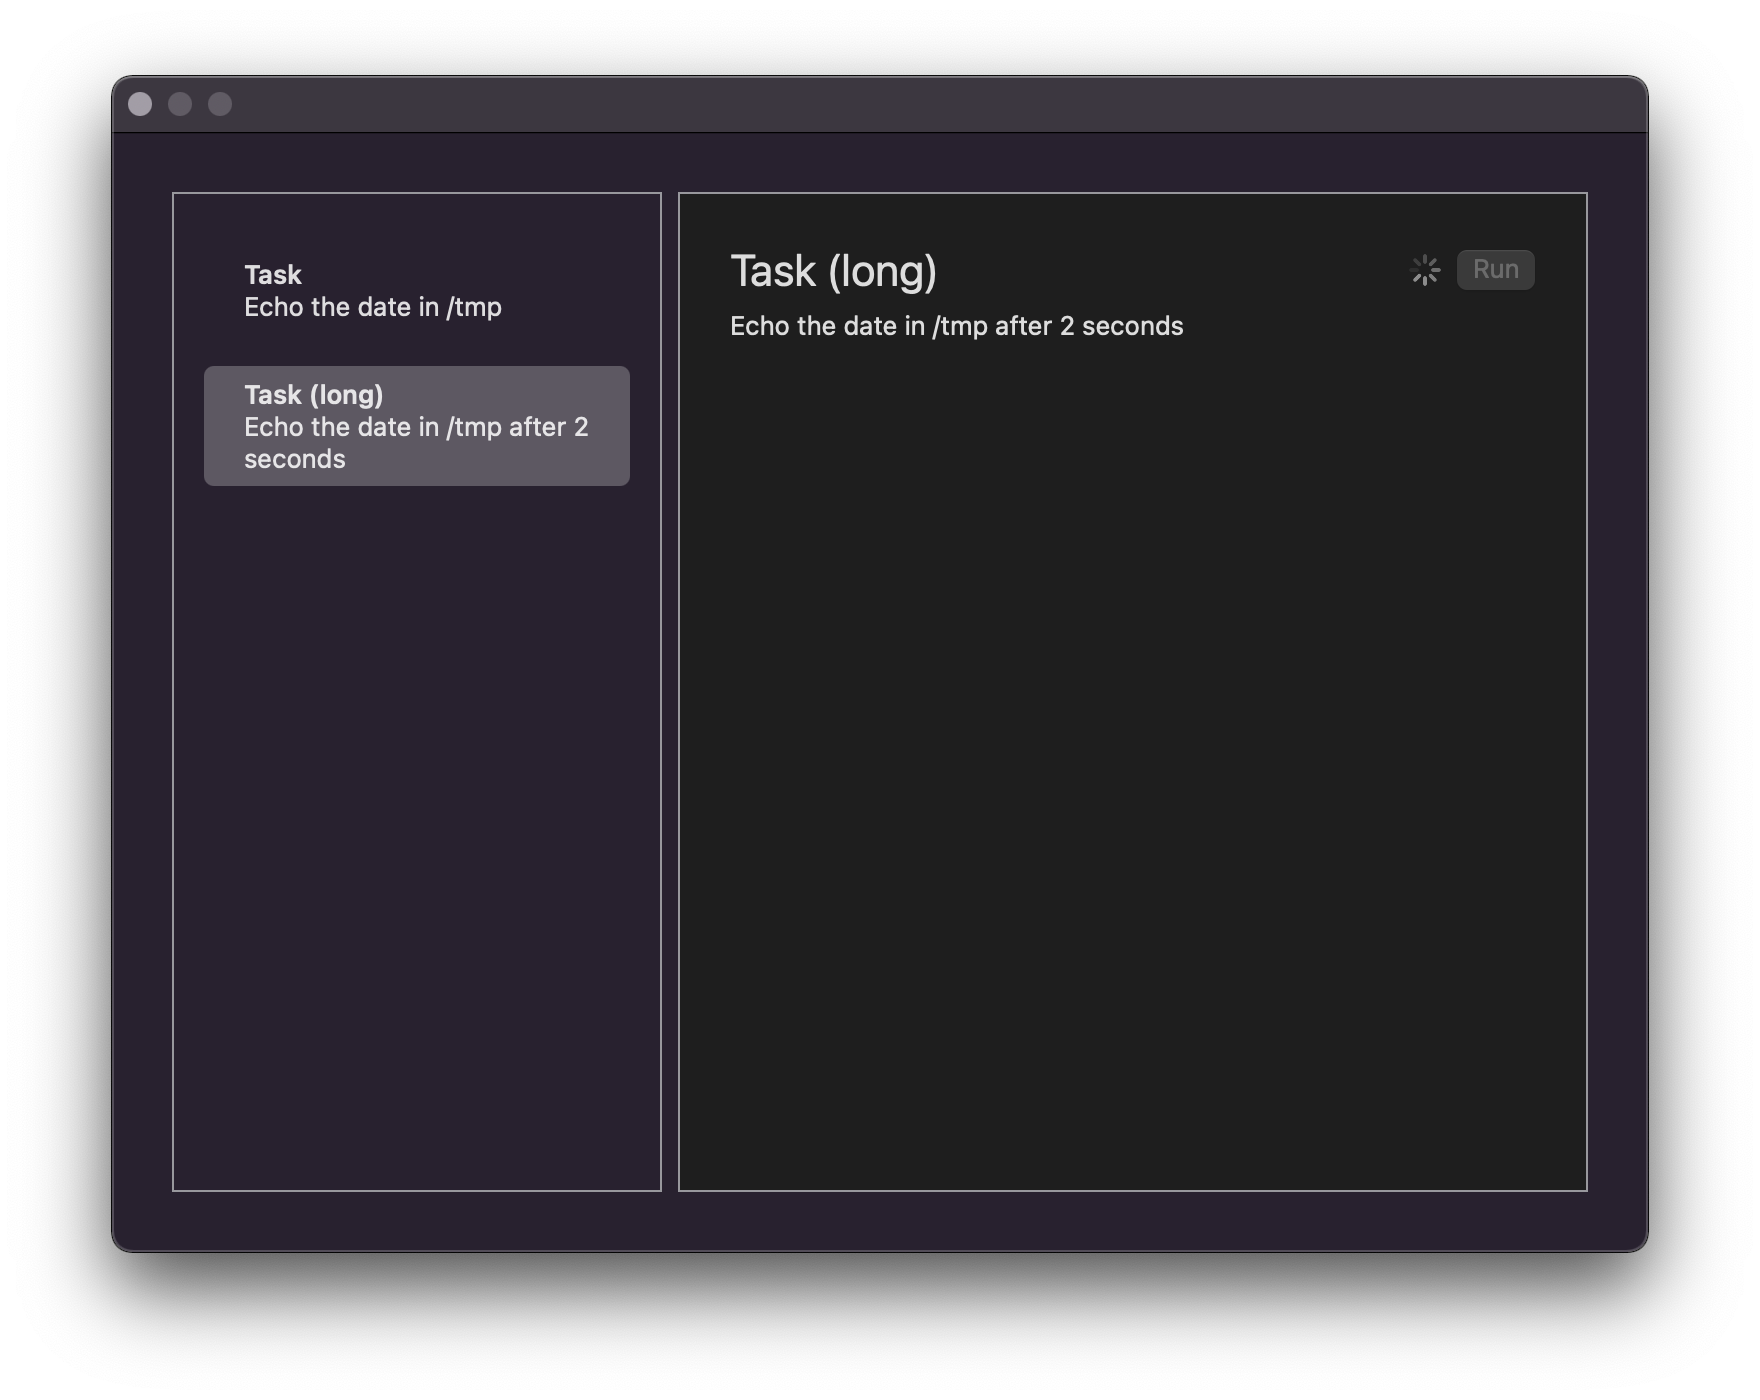
You might remark something though: when the long task is executed, there is now way to know about it. The task script execute immediately but the second one takes some time to execute. It's done artificially here but it's common to have some long execution script. The purpose of the final part is to show that in the interface.
Please wait - Display a spinner
Alright, I got some bad news for this last part. The view that we could use - ProgressView - is not available on macOS 10.15, only on macOS 11.0. The good news is that Apple provides a way to use NSViews or UIViews as SwiftUI views. Thus, we can use the NSProgressIndicator from AppKit. As a benefit, this method will give us more granularity on the view.
The make this bridge with AppKit, SwiftUI asks us to provide an object implementing the NSViewRepresentable. This protocol has two requirements (three in fact but the third one is on a type and can be inferred): we have to declare a function to make the NSView and another one to update it. This way, SwiftUI has everything it needs to make and update the view as any other of the standard views.
It's possible to deeply customise those bridge functions with the passed Context but this topic will not be tackled in this tutorial.
Here is our Spinner.
struct Spinner: NSViewRepresentable {

    // 1
    @EnvironmentObject var scriptsProvider: ScriptsProvider
    let size: NSControl.ControlSize

    // 2
    func makeNSView(context: Context) -> NSProgressIndicator {
        let indicatorView = NSProgressIndicator()
        indicatorView.isDisplayedWhenStopped = false
        indicatorView.controlSize = size
        indicatorView.style = .spinning

        return indicatorView
    }

    // 3
    func updateNSView(_ nsView: NSProgressIndicator, context: Context) {
        scriptsProvider.selectedScript.isRunning ?
            nsView.startAnimation(nil) :
            nsView.stopAnimation(nil)
    }
}- Here again we need the shared
scriptProvideras en environment object. Also, asizeproperty is used to customise the size of theNSProgressIndicatorview - Here, the function will simply make a new
NSProgressIndicatorview, do some setup and return it. - This function will be called when the
scriptsProvideris modified. This is our opportunity to start or stop the spinner. Once again we use the ternary operator: if the current selected script is running, the spinner is started, otherwise it will be stopped.
Button view in the
ScriptDetails since we want it to be on the left of the button. So between the
Spacer() and
Button please insert the
ProgressIndicator.
Spacer()
Spinner(size: .small)
Button("Run") {environmentObject is used here.
SwiftUI is smart enough to do it for you if the current view already has a
EnvironmentObject with the same type.
You can now run the long task to the see the spinner... well... not appearing. Come on now SwiftUI! That's the end of the tutorial you can't let me down.
Unless 🤔
We update the ScriptsProvider.script property, right? Because each time a script is running, we update the array with the selected index:
scripts[selectedIndex].isRunning = truescripts property as
@Published similarly with the
selectedScriptIndex:
@Published var scripts: [Script] = [.task, .longTask] And that's the end of this (quite long!) tutorial. You should have a working scripts provider interface now. In the next tutorial, we will see how to store and retrieve objects like Scripts from a Plist or JSON file. A proposed challenge will then be to come back to this tutorial and implemented this feature.
But before that, I already have two challenges to offer.
Challenges
You can find the challenges starter project and the solutions (final) in the Challenges folder.
Disable the "Run" button (easy)
When the user clicks the "Run" button, the spinner starts animating, but the button is not disabled. Thus, it's possible to click on it again. It would be great if the button was disabled while the script is running. You can use the disabled modifier.
Display the script output (hard)
As mentioned in the tutorial, Apple NSUserScriptTask API does not allow to retrieve the output. In the challenge starter project, you can find a new function runSelectedScriptWithOutput to execute the current script which lets retrieve the output in a Result variable.
For this challenge, you should add a new view to display the script output below the script details. You are free to use any view you want. The solution shows the output in a Text with a background color. You should use the function runSelectedScriptWithOutput to run the script and retrieve the output to then update a State property (on the main thread 😉).